Long time ago since last post, sorry! I bought a Raspberry Pi Model B to build my own “Dropbox”. I will show you how to install Raspbian and ownCloud on the Raspberry Pi.
What items do you need for this? I bought the following things:
- Mainboard: Raspberry Pi RBCA000 Mainboard (ARM 1176JZF-S, 512MB RAM, HDMI, 2x USB 2.0, 3,5 Watt)
- Power: Micro USB 5V 1000 mAh für Raspberry Pi B and A Model (use a power adapter with minimum 1000 mAh)
- SD-Card: Transcend Extreme-Speed SDHC 4GB Class 10
- USB-Adapter (for ownCloud Data): Kingston Data Traveler micro 16GB USB-Stick
And the case? You can use whatever you want! Feel free to use Lego, wood or anything else :) there are some cool ideas on Raspberry Pi websites. I also had an HDMI cable to my TV so I used my TV for installing Raspbian and configureing the basics (IP address, SSH access).
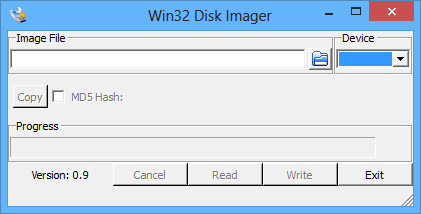
First we will download and copy the newest OS Raspbian on our SD Card. I copied it from a Windows system so I used Win32 Disk Imager (works also on Win8). After this you can download the latest Raspbian Version here. Start Win32 Disk Imager and choose your extracted Raspbian Image and your SD drive (I used an USB cardreader for this):
Click “Write” and wait until the copy job has been done. Put the “fresh” SD card into the Raspberry Pi, connect it with an USB keyboard and your TFT or TV, connect your power cable and watch it boot the OS. You will see the Raspberry Pi Configuration Tool:
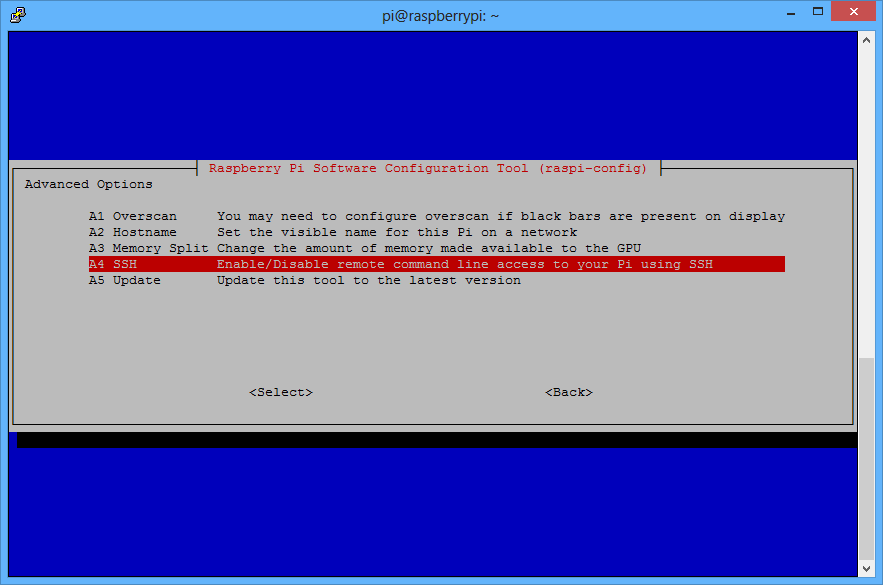
The first step is to use all the storage on you SD card, so choose “1 Expand Filesystem”. Now we will activate SSH by choosing “8 Advanced Options” and “A4 SSH”. Enable SSH for remote control of your device.
Add also your locales. Default is en_GB UTF-8 and I also select de_DE UTF-8 and en_US UTF-8. I set en_US as the default.
Connect a cable to your network, the Raspberry Pi will get an DHCP address. Look at your DHCP server leases and connect to your device via PuTTY and SSH.
For the first login, please take the user pi and password raspberry. You can let the automatic IP address configuration. For our goal we need to configure a fixed IP address. Type in:
sudo nano /etc/network/interfaces
and change your eth0 interface to something like this:
iface eth0 inet static
address 10.10.10.42
netmask 255.255.255.0
gateway 10.10.10.1
press Ctrl+O to save the file. Overwrite the file and close the nano editor with Ctrl+X. Now we need to restart the network service:
sudo /etc/init.d/networking restart
sometimes this didn’t work and you can also restart the whole machine:
sudo shutdown -r now
connect again to your Raspberry Pi and update your system:
sudo apt-get update
To run the ownCloud services we need to install the Apache2 webserver and a SQL database. I choose MySQL as my prefered database. Install the apache and mysql server with this commands:
sudo apt-get install apache2 php5 php5-gd php-xml-parser php5-intl
sudo apt-get install php5-mysql curl libcurl3 php5-curl
sudo apt-get install mysql-server
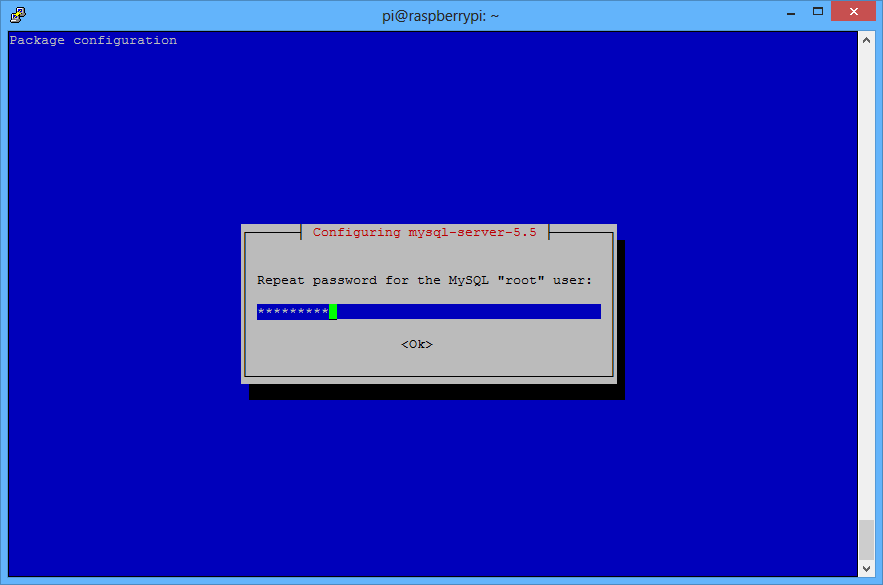
During the setup you will get a prompt to choose a root password for the MySQL service. In my example I will choose “YOURPASSWORD”.
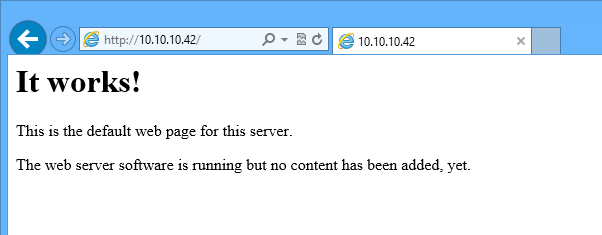
You can now test your apache webserver by connecting to your IP address via your browser:
We will now create a new database called “owncloud” (watch out for case sensitive):
mysql -uroot -pYOURPASSWORD
yes, after the parameter -u and -p is no space! You are now connected to your MySQL server and can create the new database:
CREATE DATABASE owncloud
and grant access to your new user “ownclouduser” with password “mynewpassword“:
mysql > GRANT ALL PRIVILEGES ON owncloud.* TO ownclouduser@’localhost’
[press enter here]
-> IDENTIFIED BY ‘mynewpassword’
disconnect from your MySQL server by typing in “exit“. For an explicit storage device I connect my new 16GB USB-Stick to the RaspberryPi. You can view the device by typing in “df -h“:
Filesystem Size Used Avail Use% Mounted on
rootfs 3.6G 1.8G 1.7G 52% /
/dev/root 3.6G 1.8G 1.7G 52% /
devtmpfs 212M 0 212M 0% /dev
tmpfs 44M 228K 44M 1% /run
tmpfs 5.0M 0 5.0M 0% /run/lock
tmpfs 88M 0 88M 0% /run/shm
/dev/mmcblk0p1 56M 19M 38M 33% /boot
/dev/sda1 15G 2.0G 13G 14% /mnt/usb1
You can see that the USB-Stick “/dev/sda1” is mounted to “/mnt/usb1” and I will explain how to do this permanently:
sudo nano /etc/fstab
add the sda1 device to the config-file. It should look like this:
proc /proc proc defaults 0 0
/dev/mmcblk0p1 /boot vfat defaults 0 2
/dev/mmcblk0p2 / ext4 defaults,noatime 0 1
/dev/sda1 /mnt/usb1/ vfat rw,umask=007,auto,user,users,uid=33,gid=33 0 0
The uid (User ID) is “33”. That is the system-user “www-data” which will have access to the usb device. Save the file and exit nano.
The usb device will now mount itself after a reboot. You can mount it immediately with
mount -a
create a new folder on your usb device
sudo mkdir /mnt/usb1/ocdata
To bring ownCloud alive, please download the newest version into your /var/www/ folder with the command
cd /var/www
sudo wget http://download.owncloud.org/community/owncloud-6.0.0a.tar.bz2
Look at the ownCloud website, may be there is a newer version than 5.0.10. We will extract the files and give www-data access to this folder:
sudo tar -xvjf owncloud-6.0.0a.tar.bz2
sudo chown -R www-data:www-data owncloud/
to allow big file uploads, we need to edit the php.ini:
sudo nano /etc/php5/apache2/php.ini
search for “upload_max_filesize” and “post_max_size” and change it to “512M” so you can upload files up to an half GByte filesize.
For more security we will configure https with this:
sudo nano /etc/apache2/sites-enabled/000-default
under <Directory /var/www/> change “AllowOverride” from “None” to “All” and overwrite the file. Activate HTTPS with:
sudo a2enmod rewrite
sudo a2enmod headerssudo openssl genrsa -des3 -out server.key 1024; sudo openssl rsa -in server.key -out server.key.insecure;sudo openssl req -new -key server.key -out server.csr;sudo openssl x509 -req -days 365 -in server.csr -signkey server.key -out server.crt;sudo cp server.crt /etc/ssl/certs;sudo cp server.key /etc/ssl/private;sudo a2enmod ssl;sudo a2ensite default-ssl
sudo /etc/init.d/apache2 restart
After this you are able to access your webserver with https://. As you can see, the certificate is configured with the hostname of your Raspberry Pi. I will post an update soon to show you how to generate certificates with your informations. Connect to your webserver and let us start with the ownCloud configuration (german wizard):
fill in your configured user and password. You can now upload some test files with the webinterface and can use the iPad/iPhone App and/or a Windows client.
Actually I have a problem with special characters like Ü, Ö, or Ä in the file name. I already changed this:
sudo nano /etc/mysql/my.cnf
my.cnf:
[client]
default-character-set = utf8
[mysqld]
character-set-server = utf8sudo /etc/init.d/mysql restart
sudo nano /etc/php5/apache2/php.ini
; PHP’s default character set is set to empty.
; http://php.net/default-charset
default_charset = “UTF-8”sudo nano /etc/apache2/conf.d/charset
#AddDefaultCharset UTF-8
to
AddDefaultCharset UTF-8sudo /etc/init.d/apache2 restart
but this didn’t work for me. Any other ideas?
If you see any errors or have any questions, please ask and comment :)


3 Responses
Hi Michel,
you have to install the locales, check locales that are installed with “locales -a”, if there is no en_US.utf8 locale, install it with “dpkg-reconfigure locales”. This worked for me on Debian 7 netinstall.
Greets, Frank
You want to use UTF-8 but vfat does not understand them. As far as I know you need to add an mount-point option to force UTF-8. Google for that.
Alternativly use another filesystem like ext3 (readable by many OS’s using 3rd party software)