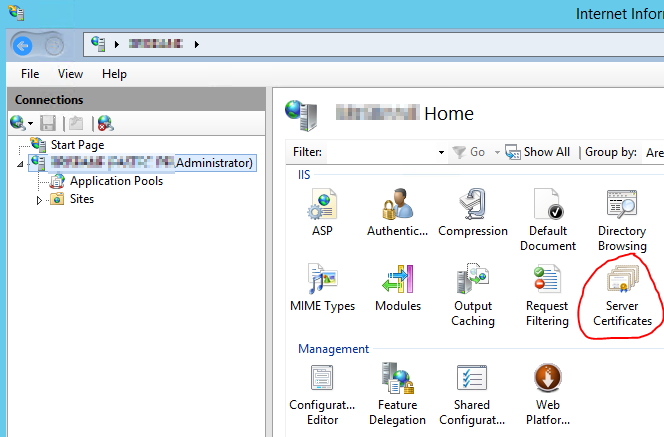
Today I will show you how to import a signed domain certificate from your own Domain Root Certification Authority. First we will generate a certificate for the Cisco router. I needed this for the WebVPN gateway to connect SSL VPN user. In my example, we will use “vpn.1337company.com“. You need a working RootCA in your windows domain. Go to the server via RDP and open the IIS management console. Go to the server certificates:
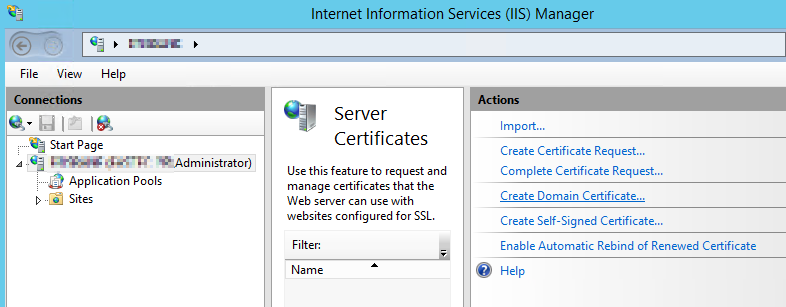
choose “Create Domain Certificate”
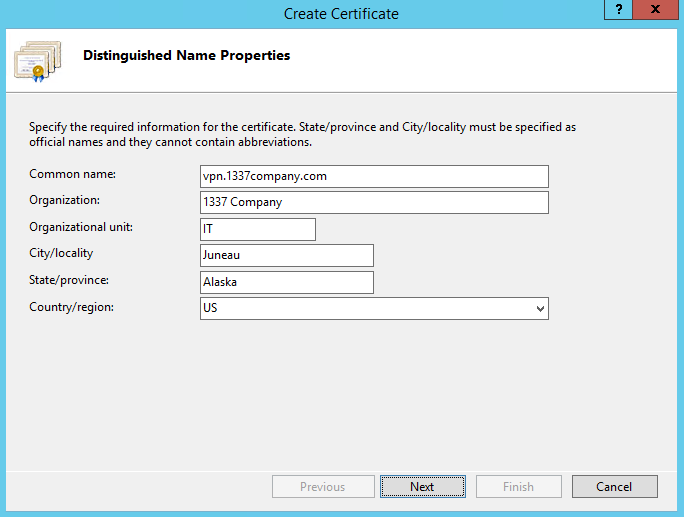
create the new certificate with the suitable name.
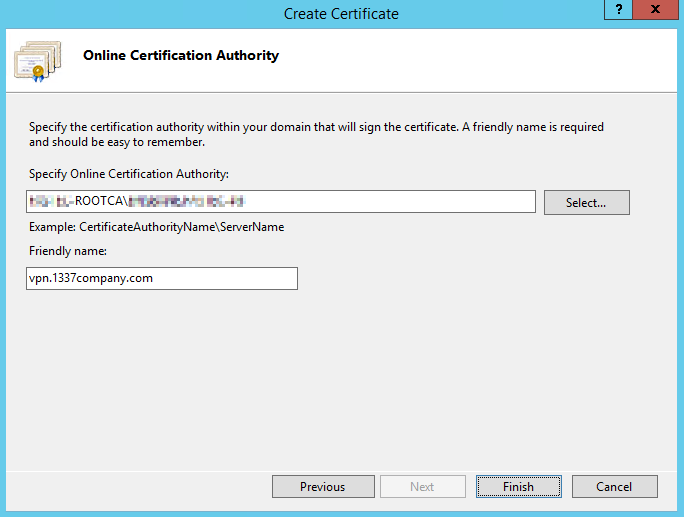
choose your RootCA and a friendly name for your certificate
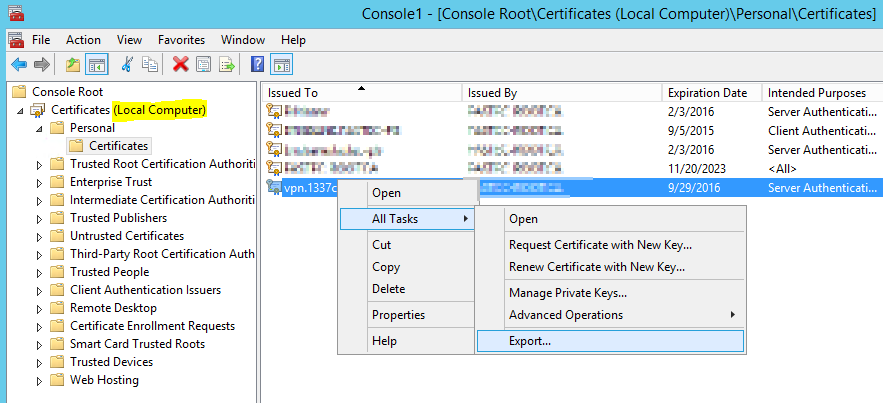
Now we will export the certificate to a pfx file containing the public certificate from your RootCA and the public and private certificate for your website / SSL VPN Gateway. We need to open the local computer certificate management console. Go to Start -> Run, type “mmc” and press Enter. Click on File -> Add/Remove Snap-In and choose “Certificates”. Choose “Computer account”, click Next, Finish and OK. Go to Personal -> Certificates and export your new certificate:
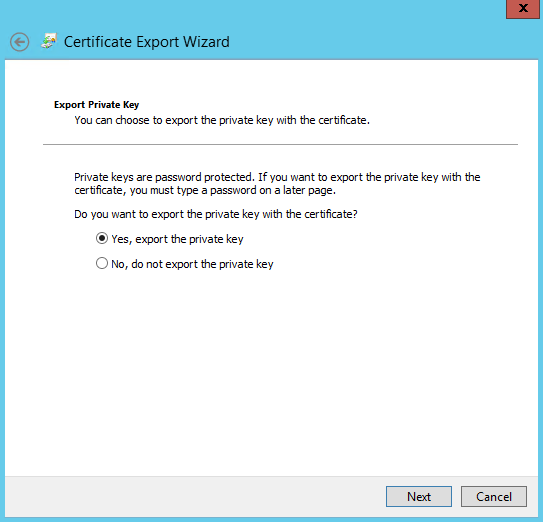
export the private key
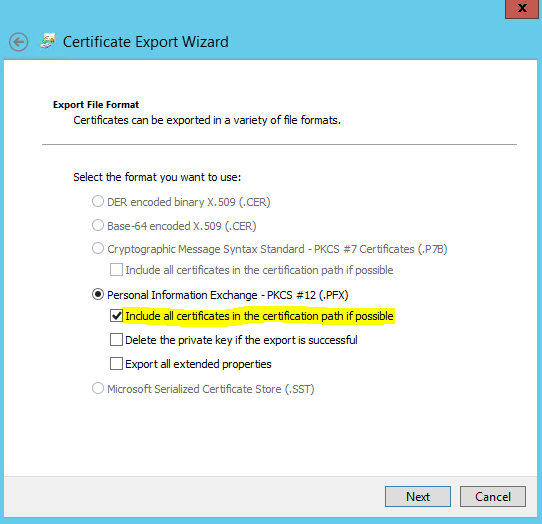
choose “include all certificates…” because we need the public certificate from your RootCA
choose a password for export. In my case I used MyPasswordABC123. Save the file as sslvpncert.pfx on your desktop.
Copy the .pfx file to your Cisco router via TFTP. I always use TFTPD32 for this.
copy tftp flash
crypto pki import vpn.1337company.com pkcs12 sslvpncert.pfx password MyPasswordABC123
Reading file from usbflash0:sslvpncert.pfx
% You already have RSA keys named vpn.1337company.com.
% If you replace them, all router certs issued using these keys
% will be removed.
% Do you really want to replace them? [yes/no]: yes
CRYPTO_PKI: Imported PKCS12 file successfully.
now change to the new certificate:
webvpn gateway CompanySSLgateway
ip address 8.7.6.5 port 443
ssl trustpoint vpn.1337company.com
go to https://yourserveraddress to see if the certificate is bounded to the webserver. If you have any problems or suggestions, please write it in the comments below.
